|
|
Additional Photos
Click to load image
L & R arrow keys scroll through photos |

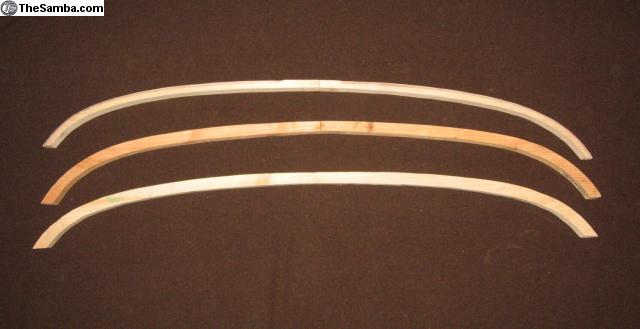
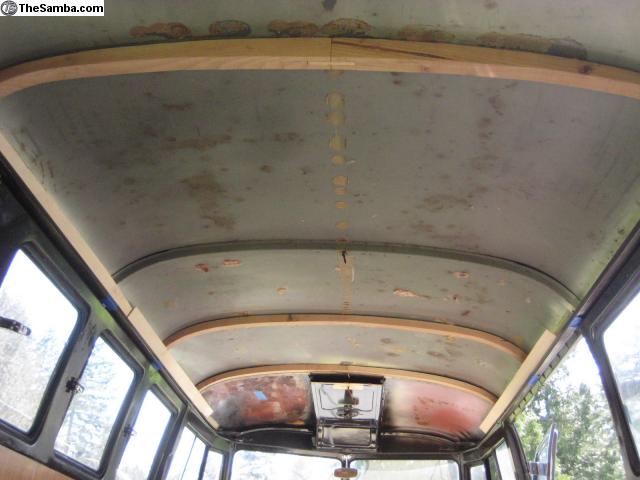
55-63 set |

55-63 set |

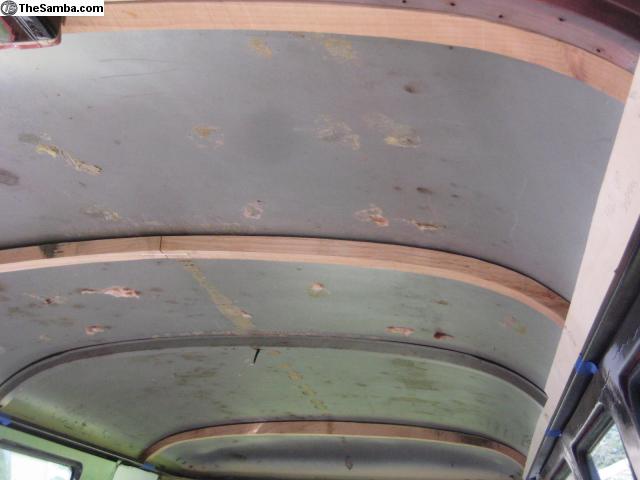
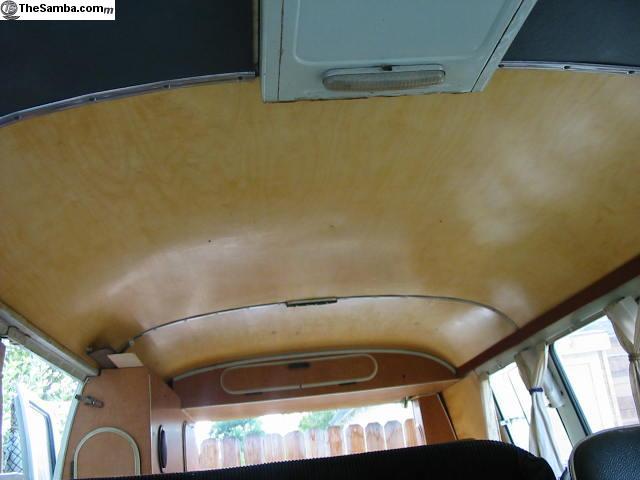
55-63 set, with front and middle roof panels in place |

64-67 set |

64-67 set |

64-67 set |

64-67 set |

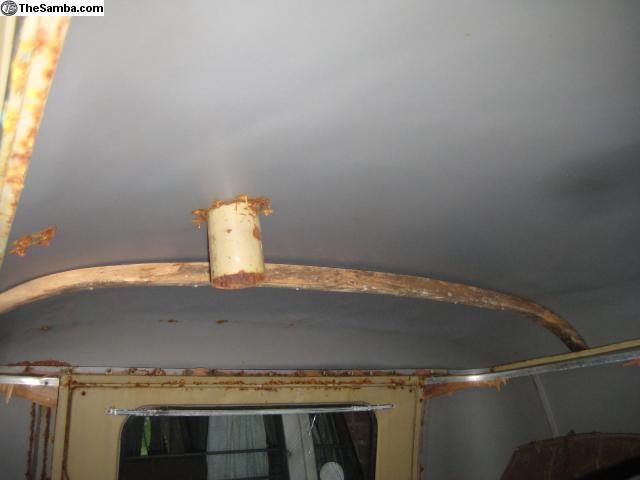
location for rear bow 55-63 |

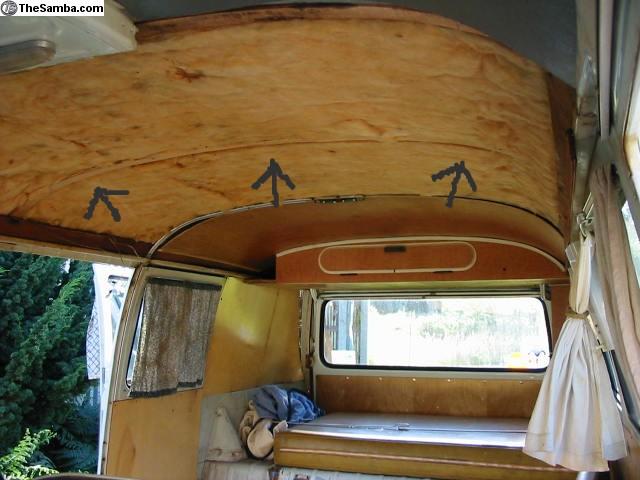
arrows point to #2 bow, tin top SO-42 |

3 screws through roof panel into #2 bow |
|
|
Wood bows for hardtop roofs Price: $250/ set of three
|
I am working on a batch, they should be ready in about a week.
For the hardtop buses, set of three wood bows.
The price for a hardtop set of three fir bows is $250.
Same price for a 55-63 set for the narrow hatch buses.
and for a 64-67 set for the wide hatch buses.
Shipping to the east coast is ~$55 as of June 2023
Shipping to California is ~$45 as of June 2023
Please let me know your zip code so I can find the shipping.
I can ship these internationally.
I can combine shipping with other items.
These go in the bus before the large Westfalia style roof panels go in.
Originally made in hardwood, I am also offering these in Fir at a reduced cost.
While the hardwood helps support the roof in pop top or hatch top campers, in a hardtop the extra strength of the hardwood is not needed. The bows merely space and brace the panels from the metal roof of the bus.
These are suitable for tintop westys, for kombis, and for panel vans.
I would NOT use these in a pop top or hatch top bus. For those, use the stronger hardwood bows.
click here for a link to hatch top westy hardwood bows: http://www.thesamba.com/vw/classifieds/detail.php?id=1229717
The bows are numbered 1, 2, 3, counting from the front of the bus.
Each bow is a different shape.
#3 bow is different for 55-63 compared to 64-67.
Each bows is made of two halfs, glued and nailed together with a keyway in the middle, like the original bows were.
The individual costs for the bows in fir are $80 each for the middle and rear bows and $120 for the front bow.
I may, or may not, have these on hand. Please allow some time when you order these. If I have to make them I cannot ship them out right away. But I can make more. Thanks!
.......................................................................................
Install tips:
Lift one end onto the inner rain gutter, lift the other end up at a diagonal to the bus, put it on top of the inner rain gutter, and then wiggle the bow so it goes directly across the bus.
#1 is in front, groove to the front, right behind the metal bow. push it forward so it touches the metal bow.
#2 in middle, right where cargo doors meet. Other end goes between the windows.
#3 in back, behind 3rd window. See pic in this ad.
The shoe horns fit at the base of the bows, tucked into the inner rain gutter.
The shoes horns are marked where they fit.
While pushing them firmly down into the inner rain gutter, nail or screw or staple the shoehorns to the wood bows, and to the middle metal bow. These keep the large roof panels from popping out of the inner rain gutter.
*Install any sound deadening or insulation AFTER the bows are in place.*
Look at the pics to see that the rear 55-63 roof panel actually touches the metal roof. There is a scuff line. Leave that line free of insulation or sounds deadening.
Install the roof panels starting from front to back.
Install the cab roof panels first.
Unscrew the dome light in back, but leave the wire hanging down. You can leave the light attached to the wire if you like.
Remove the grill at the back of the fresh air vent.
I used blue painters tape just under the inner rain gutter, and marked on it where the bows were. This made it easier to find the bows, when I wanted to put screws through the panels into the bows
For the large roof panels ones you get one side in the inner rain gutter, bend the panel into an "M" with the other side down and the middle down, lift the second side up into the other inner rain gutter. Then pop the middle up. Then you may have to shift the panel a little forwards or back.
It *really* helps to have a helper with a second pair of hands.
The big roof panels are directional, and should be installed with the front towards the front of the bus.
After all panels are in place, install rear dome light.
When installing the trim strips, tuck the outer edge into the inner rain gutter. Screw in the first screw closest to the middle of the bus. Then work your way out towards the edge. You will have to push up the roof panels at the curve of the roof.
Re-install grill at back of fresh air vent.
use three screws through the middle roof panel into the #2 wood bow
use three screws through the back roof panel into the #3 wood bow
remove blue painters tape for marking bow location.
_________________
Ill be going to
BYOB at RedBarn April 20
Kelly Park show April 21 in San Jose.
Pre-order panels to pick up at the shows.
- - - - - - - -
Here is a link to pictures with installation tips:
http://goo.gl/WX1Y6
|
|
|
|
Other ads from Clara
See all | See ads in this category
|

'55-'63 Split bus cab door panel pockets -in stock
|

Wood Bulkhead Panelling Westy style
|

6-piece LHD Barndoor Panel Set w/ Folded Pockets
|

Uber-kombi Interior Panel Set
|

Fliphatch Westfalia wood roof bows
|
|
|
|