| Author |
Message |
Kb65single
Samba Member
Joined: July 24, 2019
Posts: 273
Location: Obxnc

|
 Posted: Wed Mar 27, 2024 10:41 am Post subject: Re: Rusty 65 SC restoration Posted: Wed Mar 27, 2024 10:41 am Post subject: Re: Rusty 65 SC restoration |
 |
|
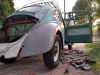
With the perimeter repairs done it was time for the front floor. Initial try in was like this. The front of the floor would hit the headlight support panel in the center leaving gaps near the a-pillars. The back of the new panel would hit the middle-slanted wall where the heater knob is. If I pushed hard to try to cram it in, paint would scrape off and my fear was that it wouldn't come back out. So I had to think for a while....
The width of the floor was about 1/8" too wide on each side near the a-pillar. Ground that to fit in between the a-pillars. Wasn't sure if the floor was centered so I took off equal amounts on both sides.
Had to repair the shipping damage on my front floor which saved me 100$ through negotiating with the Gerson rep. It was an easy fix.
There was a flange where the wheel well panel joins the middle section of the bus, on both sides, that needed relief.
The profile of the back of the floor was too straight. Viewing that profile on the dogleg made me bend the back edge of the floor up to make it curve more. On the front of the new floor, it was still hitting the headlight support panel in the middle. Finally laid it on the floor and with my feet on the middle flat part, grabbed the front with my hands and pulled hard. That made the floor smaller front to back and was finally able to get it in and out enough to see if anything along the back and sides was interfering with its fit. I could always push the front of the floor back down if I pulled to hard up.
Had to trim off about in 1/8" of the back edge and a little more in the curved wheel well parts. The hole for the dimmer switch wires needed adjustment.
The fit around the a-pillars was good width wise but the flanges that face the hinges were too tight on the passenger side and too loose on the drivers side. Not the fault of the new panel, a-pillar reconstruction wasn't done on the factory assembly line.
At this point I was just happy to get it in and out and sitting on the frame sections. I wouldn't want to do that job with nice paint around. Things got pretty scratched up, all the way to the metal. Beer time.
|
|
| Back to top |
|
 |
Kb65single
Samba Member
Joined: July 24, 2019
Posts: 273
Location: Obxnc
|
| Posted: Sun Mar 31, 2024 10:16 am Post subject: Re: Rusty 65 SC restoration |
|
|
With the front floor roughly in, I needed some reference points so I could have a repeatable try in. Kenshapiro2002 did a nice job of explaining his trials and errors on his front floor replacement. His writeup helped me a lot since this was my first attempt. The floor metal around the shifter seemed to match up to the bus metal pretty well. It was in the center of everything making it a good reference point. Found a couple of large bolts that fit in those holes and bolted it there. From underneath used a Sharpy marker to trace the borders of the frame positions and the metal under the shifter and emergency brake. Drilled some 3/16" holes using the original floor as a templet. Screwed the floor metal to the frame front and back and to the shifter metal front and back. Put one screw on the sides to pin it to the dogleg.
With things screwed down in the middle I could fit the floor 360deg. Started on the both sides at the doglegs. The passenger side fit almost perfect. I was using the door seal dimensions of 10mm deep and 18-20mm tall just like the when the doglegs were put in.
Drivers side was a little different. That side was a little short.
Had to add some length with some Gerson metal left over from previous repairs.
The metal on the front edge of the drivers wheel well was paper thin and decided to replace it. Thicker metal to screw and weld to.
Punched holes down the sides and along the back. The floor holes that get welded to the dogleg flange is a narrow target. The flange is only 7mm wide. Can't vary from side to side very far. Sides and back are ready to weld, next is fitting the front.
|
|
| Back to top |
|
|
Kb65single
Samba Member
Joined: July 24, 2019
Posts: 273
Location: Obxnc
|
| Posted: Mon Apr 08, 2024 7:20 am Post subject: Re: Rusty 65 SC restoration |
|
|
The front of the bus floor needed a lot of 3/16" holes to plug weld to the headlight support panel. Getting those areas clamped tight together was a challenge. Tried a variety of clamps and wedge combinations to get them together. All the clamps/vice grips were all too big because of the front nose skin. My 18" vice grips would work but just in the area that the V of the nose skin would puff out. Best solution was to modify my cheapest Harbour Fright 18" vice grip. Reduced the length of one of the clamp arms so it would fit.
With the modification the clamp worked great, and I was able to screw that section of the floor to the headlight support panel. The screws that I use only require a 1/8" pilot hole and the 3/16" holes in the new floor allow the headlight support panel to easily draw the two pieces of metal together. This was the same method ken shapiro 2002 used and is what I used everywhere on my floor. The only exception was the area in between the wheel well panels on the back wall. The screws were too long in that area and would bump into a metal panel behind it, so I had to switch to shorter machine screws. Clamping on the floor side requires a 1/2" X 1/2" small bar so that the flange that holds the front decorative panels won't get crushed. (you can see it in the picture if you blow it up)
When the front floor was out to drill the holes it made sense to change the bushings in my newly "corncob welded" clutch pedal. With aftermarket floors, verification of the stamped holes was necessary.
Scott Stuart from Pedal Werks.com supplied me with the tools to extract the old bushing and install the new ones.With the floor out this was the absolute correct time to do this. Access and visibility for an aging man is really really cool.
Screw in the supplied tap and stick the supplied metal rod in from the opposite end through the brake pedal hole. Hammer on the rod and drive the driver's side bushing out.
Stick the tap back in the same clutch hole (it would not screw in because it was too short). Follow that with the metal rod and hammer the rod until the passenger side bushing comes out.
Original bushings were VW issue with the V over the W with a circle around it. Part #211 721 153B four more figures after that were a funky shaped $G followed by S7.
Cleaned out the hole and the new bushings slid in with no problems. The bushings showed a lot of wear, and the clutch arm went in easily and felt smooth. I felt good about doing it. |
|
| Back to top |
|
|
Kb65single
Samba Member
Joined: July 24, 2019
Posts: 273
Location: Obxnc
|
| Posted: Fri Apr 12, 2024 6:45 am Post subject: Re: Rusty 65 SC restoration |
|
|
With the floor fitting around the perimeter, the holes stamped inside needed to be tested. Brake pedal installed and it fit in the center when it was up or down.
Clutch pedal with the new bushings installed would scrape the hole on one side when it was up and would almost scrape on the other side when down.
When Scott of Pedal Werks does the corn cob welding of the shaft he also doubles the thickness of the bar that runs from the shaft to where the two-part pedal assembly screws together. I called him up to see if anyone else has had this problem. He said that the arm is welded in a jig made from an NOS arm. Couldn't complain about someone taking the necessary precautions, but it needed to be fixed. The bar needed to bend in two planes, it needed to adjust in and out and it needed to be twisted. The bar is powder coated after it is reconditioned and didn't want to screw that coating up. Used a cheater pipe to help with the bending. Used some small metal plates to keep the sharp edges of the pipe away from the powder coating. The twist was evident by holding a square against the pedal assembly. It was a lot of trail and error getting the right combination of twist and bend. Steering column next.
|
|
| Back to top |
|
|
70bus 
Samba Member
Joined: July 15, 2004
Posts: 584
Location: P.O.
|
| Posted: Fri Apr 12, 2024 10:47 am Post subject: Re: Rusty 65 SC restoration |
|
|
You didn't want to just get a round file and hog out the pedal hole? :)
_________________
Craig K
70 Neunsitzer
65 Pritschenwagen
"If Von Dutch was alive, he'd walk in there with a pistol and shoot these people."
-Robert Williams |
|
| Back to top |
|
|
chrisflstf
Samba Member
Joined: February 10, 2004
Posts: 3450
Location: San Diego
|
| Posted: Fri Apr 12, 2024 11:28 am Post subject: Re: Rusty 65 SC restoration |
|
|
| Quote: |
| You didn't want to just get a round file and hog out the pedal hole? |
Dont think that is Kens style  |
|
| Back to top |
|
|
Kb65single
Samba Member
Joined: July 24, 2019
Posts: 273
Location: Obxnc
|
| Posted: Fri Apr 12, 2024 11:35 am Post subject: Re: Rusty 65 SC restoration |
|
|
| 70bus wrote: |
You didn't want to just get a round file and hog out the pedal hole?  |
It was tempting but I checked with Wolfsburg West and they didn't have any long oval clutch pedal sealing gaskets. Round ones were on sale, so I figured that was the way to go. 
Ken |
|
| Back to top |
|
|
Kb65single
Samba Member
Joined: July 24, 2019
Posts: 273
Location: Obxnc
|
| Posted: Tue Apr 16, 2024 6:46 am Post subject: Re: Rusty 65 SC restoration |
|
|
Steering column try-in: jacked up the bus and bolted the box to the frame. Some scraping on the hole.
Attaching the steering column to the dash involves some crudely manufactured attachment points. The bracket that holds the column to the to the bus has two bolts to the parcel tray and one bolt that attaches the speedometer pod to the bracket. That attachment point was bent down and wouldn't allow the column bracket to touch the speedometer pod. The parcel tray is bolted to structural steel between the a-pillars with three Phillips head machine bolts/screws.
Bent that up but was really flimsy. During the multiple try ins to get the column hole in the proper location the parcel tray kept falling down. That created this gap.
That pissed me off because the parcel tray and speedo pod should look like this.
Made a bracket that attaches those two things together using the same style phillips head machine screws to bolt them together.
Adjusted the hole in the floor. Hopefully this will speed up the assembly process after paint.
A few more items that need to be addressed before welding the floor down. |
|
| Back to top |
|
|
pyrOman
Fire Master

Joined: July 21, 2003
Posts: 12413
Location: Over 2002 posts deleted!
|
| Posted: Tue Apr 16, 2024 10:34 am Post subject: Re: Rusty 65 SC restoration |
|
|
Great idea! 
| Kb65single wrote: |
Made a bracket that attaches those two things together using the same style phillips head machine screws to bolt them together.
|
_________________
Some people are so busy being clever they don't have time enough to be wise. |
|
| Back to top |
|
|
70bus
Samba Member
Joined: July 15, 2004
Posts: 584
Location: P.O.
|
| Posted: Tue Apr 16, 2024 10:43 am Post subject: Re: Rusty 65 SC restoration |
|
|
You could sell those brackets!
If you didn't know, after mocking-up you'll want that tray out before you rewire. Unless you have tiny hands and a saint-like demeanor.
My steering tube also touches the floor; not enough to scrape, but enough to distort the seal
The ebrake and shifter holes also looks odd, but worked fine with no issues for me.
The hi/lo switch hole on mine was awful however. Luckily hole-hogging is one of my few skills...
_________________
Craig K
70 Neunsitzer
65 Pritschenwagen
"If Von Dutch was alive, he'd walk in there with a pistol and shoot these people."
-Robert Williams |
|
| Back to top |
|
|
Kb65single
Samba Member
Joined: July 24, 2019
Posts: 273
Location: Obxnc
|
| Posted: Tue Apr 16, 2024 1:02 pm Post subject: Re: Rusty 65 SC restoration |
|
|
| pyrOman wrote: |
Great idea!
| Kb65single wrote: |
Made a bracket that attaches those two things together using the same style phillips head machine screws to bolt them together.
|
|
Thanks, Hated to drill a hole in the speedo pod but if I painted the screws/bolts the same color as the bus it would work out. Maybe a new m-code |
|
| Back to top |
|
|
Kb65single
Samba Member
Joined: July 24, 2019
Posts: 273
Location: Obxnc
|
| Posted: Tue Apr 23, 2024 7:16 am Post subject: Re: Rusty 65 SC restoration |
|
|
70Bus
One time only on the bracket but I recognize the need . My emergency brake hole looks like yours; hole is bigger than it needs to be. I was wondering if there was a seal around the steering column, now I know. Let's hear that motor run!!!
Another issue around the front floor. When disassembling the bus, I really didn't notice this area. This is where the clutch cable exits the splash pan area and enters the tube that carries the cable to the rear of the bus. With the area painted it was strange to see the hacking out of a former round hole. Had to find out, why was this necessary? Nobody does this without a reason.
Found the old clutch cable and passed it through the normal route to the transaxle area. Needed to create some tension on the cable to simulate normal operation. Stuck a piece of angle iron across the engine lid opening. Attached a spring with some bailing wire so it would be a functioning clutch pedal.
With the pedal up this was the location of the cable.
With the pedal depressed I found out why the PO hacked the round hole.
Solved the problem by just eliminating the sharp jagged metal. Hole-hogging in the first degree.
While I was in the area, decided to check the heat plumbing path from back to front. Previously repaired the rust holes in the system but that fit the hole in the old front floor. The new floor needed a try in before paint. That hole needed minor adjustment but would have screwed up the final paint. Needed to make the hole more egg shaped by hammering. The KF green paint flakes off when the metal is hammered on or grasped with vise grips.
|
|
| Back to top |
|
|
70bus
Samba Member
Joined: July 15, 2004
Posts: 584
Location: P.O.
|
| Posted: Tue Apr 23, 2024 1:21 pm Post subject: Re: Rusty 65 SC restoration |
|
|
Welcome to the Royal Order of Holehoggers! I do wonder what made it necessary - is the end of frame tubing missing?
_________________
Craig K
70 Neunsitzer
65 Pritschenwagen
"If Von Dutch was alive, he'd walk in there with a pistol and shoot these people."
-Robert Williams |
|
| Back to top |
|
|
Buggeee
Samba Member
Joined: December 22, 2016
Posts: 4429
Location: Stuck in Ohio
|
|
| Back to top |
|
|
70bus
Samba Member
Joined: July 15, 2004
Posts: 584
Location: P.O.
|
| Posted: Thu Apr 25, 2024 4:59 pm Post subject: Re: Rusty 65 SC restoration |
|
|
I looked at my clutch cable, and found that while it did get close to the upper edge of hole, the grommet seemed to stop it (for now!).
I was hearing a loud noise, so looked at the frame tube, where the cable enters behind the cab; between being a replacement tube and perhaps positioned a bit off when welded, the cable was rubbing the tube 's upper lip quite a bit. Had eaten up the rubber boot already! Bending tube carefully up and over a bit took most of that out. Not too sharp a bend or end won't go through easily... both of these are 'after' pics.
Not saying this caused the hole to be hogged, but both our trucks had a hard life, and things may not point to where they are supposed to!
_________________
Craig K
70 Neunsitzer
65 Pritschenwagen
"If Von Dutch was alive, he'd walk in there with a pistol and shoot these people."
-Robert Williams |
|
| Back to top |
|
|
Who.Me?
Samba Member
Joined: July 14, 2014
Posts: 2214
Location: UK (South)
|
| Posted: Fri Apr 26, 2024 12:06 am Post subject: Re: Rusty 65 SC restoration |
|
|
| 70bus wrote: |
Not saying this caused the hole to be hogged, but both our trucks had a hard life, and things may not point to where they are supposed to! |
Be aware that could make replacement of the clutch cable difficult. The threaded ferrule(?) at the rearward end of the cable needs to fit through that tube if you need to replace it. My tube has a slight bend there and I struggled to push a new cable through when the old one snapped. Had to straighten it slightly to do so.
Kb65single - I'd agree with 70bus's suspicion about the clutch cable tube, but possibly in a different way...
Is your metal guide tube the right length and welded to the bracket that projects from the frame? I'd expect it to hold the cable in the right place to prevent it riding up and down. I'm wondering if it's too short, or unsecured at its end, so it's allowing more degrees of movement than intended and that's allowing it to move outside the bounds of that hole?
_________________
Andy
Looking for info on my truck's history. Are you from Campbell California or nearby. Do you recognise it? ... http://www.thesamba.com/vw/forum/viewtopic.php?t=636786 |
|
| Back to top |
|
|
70bus
Samba Member
Joined: July 15, 2004
Posts: 584
Location: P.O.
|
| Posted: Fri Apr 26, 2024 12:25 am Post subject: Re: Rusty 65 SC restoration |
|
|
Agreed with Andy here
| Quote: |
| Not too sharp a bend or end won't go through easily. |
And on the point that there's a reason the cable is lifting when taut. Whether it's the tube holding it funny or something else, you've done too much hard work not to explore this a bit. Who knows, you might find a frame alignment you need to fix and teach us how to do!
The fact that a PO got pissed enough about the rubbing to tear the bulkhead implies either a factory issue, missing part, or a long-ago change like an accident or repair somewhere that didn't go well.
_________________
Craig K
70 Neunsitzer
65 Pritschenwagen
"If Von Dutch was alive, he'd walk in there with a pistol and shoot these people."
-Robert Williams |
|
| Back to top |
|
|
Kb65single
Samba Member
Joined: July 24, 2019
Posts: 273
Location: Obxnc
|
| Posted: Fri Apr 26, 2024 5:47 am Post subject: Re: Rusty 65 SC restoration |
|
|
| 70bus wrote: |
| Welcome to the Royal Order of Holehoggers! I do wonder what made it necessary - is the end of frame tubing missing? |
Thanks for the invitation to an exclusive group of people who can Royally make all holes bigger
The end of the tube was not missing. I did have to replace the metal behind the bracket that holds that tube in place, but I marked the location of the bracket before that. I can't guarantee that it is in its factory position because of all the metal I had to replace around it. I do believe that the cable tube has not been replaced and its length is correct.
The clutch cable should move up slightly (1-2mm) when you push down on the pedal. The cable attaches to an arm that attaches to the shaft that is anchored in the frame. That arm moves forward when you depress the pedal. That arm moves the cable to a more vertical position when you do that. If the picture you took was when the pedal was up, you might be scraping metal when the pedal is down. Need to wedge a block of wood to hold the pedal down, then see where the cable is. Maybe Hans and Franz at the assembly line were having a bad week in 65. I went back and checked the position of the cable at the tube when the pedal was up and down, and it did change, but did touch the side of the tube. I was so happy to find about the reason for the hacking that I dropped the ball, not checking the cable entry end. One thing I did notice, and it could be the pictures, but your clutch tube looks smaller than mine. Mine is 12mm, yours looks smaller compared to the cable. My tube is funnel shaped on the end which relieves some of the stress on the cable. I think the PO over compensated solving his problem, didn't what to hack twice.
|
|
| Back to top |
|
|
Kb65single
Samba Member
Joined: July 24, 2019
Posts: 273
Location: Obxnc
|
| Posted: Yesterday 7:50 am Post subject: Re: Rusty 65 SC restoration |
|
|
Buggeee
Thanks for your kind comments on my build. Learning new words is fun especially when the word is fun to say. Read your build thread maybe a year ago. Enjoyed your "get at it" attitude especially the battery tray corner and d-pillar repairs. Glad you are enjoying your bus, stories like yours keep me motivated. Grew up in Toledo my first 25 years so I'm familiar with your terrain.
Ken
Who.Me
Thanks for chiming in to offer help/suggestions.
Ken
Gas pedal install was next. Couldn't save anything attached to the old floor so ordered WW replacements.
Also ordered the Butty's Bits new and improved accelerator linkage kit.
Bought a new reproduction pedal also and was impressed with it. Same size as the old pedal. Don't know if what I had was OG but seeing what was left of the bottom half, maybe not. Pinned the mounting plate together with the new and old pedals. The range of motion/swing was a little different between the two.
Didn't know how vertical the pedal should be, so I bent the back flange of the new pedal back to increase the swing range. The bracket that welds to the floor has two holes in it to supposedly pair up with two raised nubs on the green floor. They did not pair up well.
Drew some lines on the floor that followed the alignment of the raised dimples. Those lines pointed the pedal at an odd angle. I didn't like it and changed it to point more straight ahead. Made more sense to me and the cable mechanism under the floor wouldn't get torqued with it at that odd angle.
Installed the Buttys Bits kit. It was difficult to get the two middle washers in place and get the bolt pushed through at the same time but eventually it happened. Stuck my old accelerator cable in to verify that it would actually get to the end of the bus. Used the same clutch pedal set up (lighter springs) to test it out.
Insert Vroom Vroom noises.
There is a small metal bar included with the kit that should hook a spring to part of the frame metal. Searched thru the forums to find out where the best location for that bar should be. I suck at searching. Buttys Bits didn't offer any guidance. One guy located the small bar on the bottom of the master cylinder support bar that crosses between the two main frame members. That seemed to stretch the spring too much. I put the bar on the top of that MC support bar. Spring does touch the loop of the accelerator cable and that concerned me. If anybody reads this, please post how you did it. Here's my pictures of the bar location. I might move the small bar laterally (away from the emergency brake bracket) to steer it away from the cable. The spring does offer a lot of resistance. Will see how it pairs with the carb spring when the engine is in. In my estimation the mechanism is a vast improvement over the previous style. (sorry VW engineers)
|
|
| Back to top |
|
|
70bus
Samba Member
Joined: July 15, 2004
Posts: 584
Location: P.O.
|
| Posted: Today 12:40 am Post subject: Re: Rusty 65 SC restoration |
|
|
Heres my BB install; keep in mind it is a bit odd because my J bracket was abused, but it is the same configuration Simon at BB used on his bus. I have no issues with anything at this end contacting other parts.
Im not convinced Im getting the best pedal response yet, but I suspect that isnt the BB fault. I did read some people ended up preferring stock response, but I have a feeling if you can dial it in the Heim-style setup will be nice.
I also measured my clutch tube for you; not very flared, but still about 12mm. Cable is 3 or 4 mm OG German.
_________________
Craig K
70 Neunsitzer
65 Pritschenwagen
"If Von Dutch was alive, he'd walk in there with a pistol and shoot these people."
-Robert Williams |
|
| Back to top |
|
|
|


