Posted: Sun May 12, 2024 8:09 pm
Size: 1280x960 Views: 33
Rating: Not rated
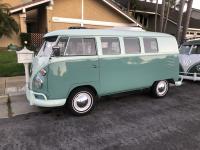
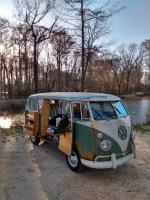
Grandpa got a brand new bus docporsche356
I just got my 1962 VW Microbus from Greg Hale in Huntington Beach CA. I can't believe how beautiful it is. Everything turned out EXACTLY the way I wanted it. Greg did an awesome job meeting all my special requests. I had him install AC, spin-on oil filter, external auxiliary oil cooler on a 1776 cc engine. Greg is honest, funny, and professional. He's great to work with and is now a friend for life. If you want a GREAT bus see Greg Hale. View other images: From docporsche356 Search Forums for photo
Posted: Sun May 12, 2024 8:09 pm
Size: 1600x1200 Views: 44
Rating: 10
Grandpa got a brand new bus docporsche356
I just got my 1962 VW Microbus from Greg Hale in Huntington Beach CA. I can't believe how beautiful it is. Everything turned out EXACTLY the way I wanted it. Greg did an awesome job meeting all my special requests. I had him install AC, spin-on oil filter, external auxiliary oil cooler on a 1776 cc engine. Greg is honest, funny, and professional. He's great to work with and is now a friend for life. If you want a GREAT bus see Greg Hale. View other images: From docporsche356 Search Forums for photo
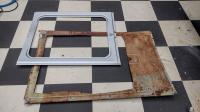
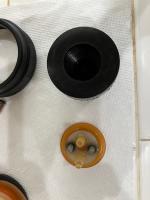
Posted: Sun May 12, 2024 2:35 pm
Size: 1200x1600 Views: 10
Rating: Not rated
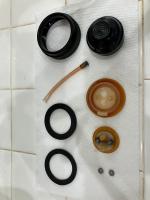
Washer Bottle Button Ronald Eisel
I purchased an original washer bottle from a Samba member with a cracked and hardened rubber button. The bottle cap assembly is of a late style with a knurled ring instead of a notched one. The internal configuration is also quite different. The replacement of the rubber button is accomplished by disassembling the cap entirely. The two 7mm nuts need to be removed and the parts of the cap need to be separated. Then the part with the tubulations is inserted into the opening of the rubber button. Once this has been done the screws are inserted into the larger plastic ring (note that the bases of the tubes are of different diameters) the tubes must be placed into the corresponding holes of the larger ring. The sealing gasket can be replaced with the same ring I described in my earlier posting concerning the sealing washer replacement. Once the parts are together the rubber parts will need to be lubricated with soap so the pieces can rotate when the cap is placed on the threaded portion of the bottle. The tightness of the rubber parts should disappear with use. I found that removing the button assembly and sanding the outer surface of the new sealing washer improved the ability to tighten the attachment ring to the bottle threads. View other images: From Ronald Eisel Search Forums for photo
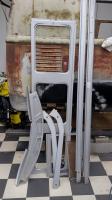
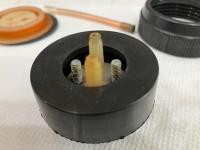
Posted: Sun May 12, 2024 2:35 pm
Size: 1200x1600 Views: 5
Rating: Not rated
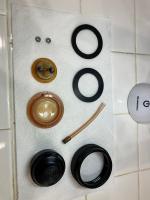
Washer Bottle Button Ronald Eisel
I purchased an original washer bottle from a Samba member with a cracked and hardened rubber button. The bottle cap assembly is of a late style with a knurled ring instead of a notched one. The internal configuration is also quite different. The replacement of the rubber button is accomplished by disassembling the cap entirely. The two 7mm nuts need to be removed and the parts of the cap need to be separated. Then the part with the tubulations is inserted into the opening of the rubber button. Once this has been done the screws are inserted into the larger plastic ring (note that the bases of the tubes are of different diameters) the tubes must be placed into the corresponding holes of the larger ring. The sealing gasket can be replaced with the same ring I described in my earlier posting concerning the sealing washer replacement. Once the parts are together the rubber parts will need to be lubricated with soap so the pieces can rotate when the cap is placed on the threaded portion of the bottle. The tightness of the rubber parts should disappear with use. View other images: From Ronald Eisel Search Forums for photo
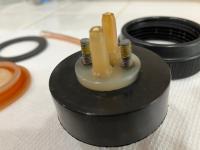
Posted: Sun May 12, 2024 2:35 pm
Size: 1200x1600 Views: 2
Rating: Not rated
Washer Bottle Button Ronald Eisel
I purchased an original washer bottle from a Samba member with a cracked and hardened rubber button. The bottle cap assembly is of a late style with a knurled ring instead of a notched one. The internal configuration is also quite different. The replacement of the rubber button is accomplished by disassembling the cap entirely. The two 7mm nuts need to be removed and the parts of the cap need to be separated. Then the part with the tubulations is inserted into the opening of the rubber button. Once this has been done the screws are inserted into the larger plastic ring (note that the bases of the tubes are of different diameters) the tubes must be placed into the corresponding holes of the larger ring. The sealing gasket can be replaced with the same ring I described in my earlier posting concerning the sealing washer replacement. Once the parts are together the rubber parts will need to be lubricated with soap so the pieces can rotate when the cap is placed on the threaded portion of the bottle. The tightness of the rubber parts should disappear with use. View other images: From Ronald Eisel Search Forums for photo
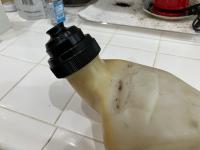
Posted: Sun May 12, 2024 2:35 pm
Size: 1600x1200 Views: 3
Rating: Not rated
Washer Bottle Button Ronald Eisel
I purchased an original washer bottle from a Samba member with a cracked and hardened rubber button. The bottle cap assembly is of a late style with a knurled ring instead of a notched one. The internal configuration is also quite different. The replacement of the rubber button is accomplished by disassembling the cap entirely. The two 7mm nuts need to be removed and the parts of the cap need to be separated. Then the part with the tubulations is inserted into the opening of the rubber button. Once this has been done the screws are inserted into the larger plastic ring (note that the bases of the tubes are of different diameters) the tubes must be placed into the corresponding holes of the larger ring. The sealing gasket can be replaced with the same ring I described in my earlier posting concerning the sealing washer replacement. Once the parts are together the rubber parts will need to be lubricated with soap so the pieces can rotate when the cap is placed on the threaded portion of the bottle. The tightness of the rubber parts should disappear with use. View other images: From Ronald Eisel Search Forums for photo
Posted: Sun May 12, 2024 2:35 pm
Size: 1600x1200 Views: 1
Rating: Not rated
Washer Bottle Button Ronald Eisel
I purchased an original washer bottle from a Samba member with a cracked and hardened rubber button. The bottle cap assembly is of a late style with a knurled ring instead of a notched one. The internal configuration is also quite different. The replacement of the rubber button is accomplished by disassembling the cap entirely. The two 7mm nuts need to be removed and the parts of the cap need to be separated. Then the part with the tubulations is inserted into the opening of the rubber button. Once this has been done the screws are inserted into the larger plastic ring (note that the bases of the tubes are of different diameters) the tubes must be placed into the corresponding holes of the larger ring. The sealing gasket can be replaced with the same ring I described in my earlier posting concerning the sealing washer replacement. Once the parts are together the rubber parts will need to be lubricated with soap so the pieces can rotate when the cap is placed on the threaded portion of the bottle. The tightness of the rubber parts should disappear with use. View other images: From Ronald Eisel Search Forums for photo
Posted: Sun May 12, 2024 2:35 pm
Size: 1600x1200 Views: 3
Rating: Not rated
Washer Bottle Button Ronald Eisel
I purchased an original washer bottle from a Samba member with a cracked and hardened rubber button. The bottle cap assembly is of a late style with a knurled ring instead of a notched one. The internal configuration is also quite different. The replacement of the rubber button is accomplished by disassembling the cap entirely. The two 7mm nuts need to be removed and the parts of the cap need to be separated. Then the part with the tubulations is inserted into the opening of the rubber button. Once this has been done the screws are inserted into the larger plastic ring (note that the bases of the tubes are of different diameters) the tubes must be placed into the corresponding holes of the larger ring. The sealing gasket can be replaced with the same ring I described in my earlier posting concerning the sealing washer replacement. Once the parts are together the rubber parts will need to be lubricated with soap so the pieces can rotate when the cap is placed on the threaded portion of the bottle. The tightness of the rubber parts should disappear with use. View other images: From Ronald Eisel Search Forums for photo
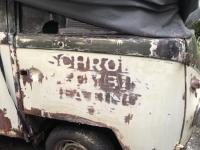
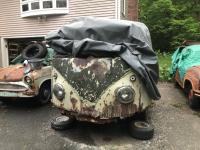
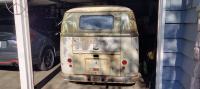
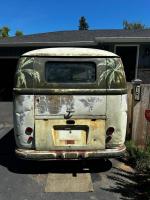
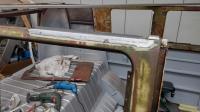
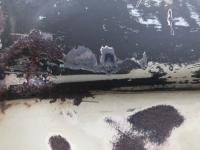
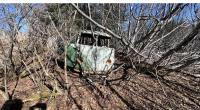
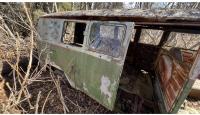
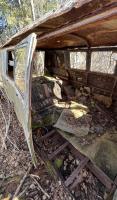
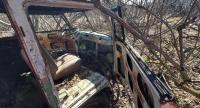
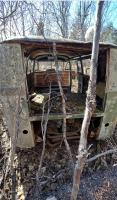
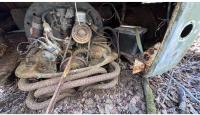
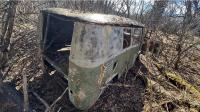
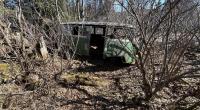
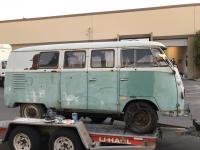
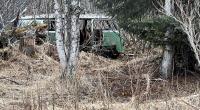
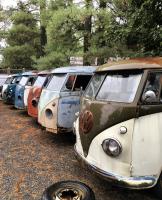
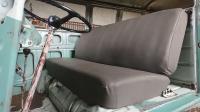
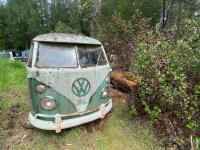
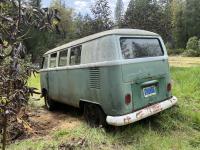
Posted: Sun May 12, 2024 12:46 pm
Size: 1125x623 Views: 23
Rating: Not rated
Bus hunting find rag63
My sister found this Bus in the woods near her home and sent me this picture.
I asked her to go back for more detailed pics. Looked somewhat picked over, but who knows what is still there? View other images: From rag63 Search Forums for photo
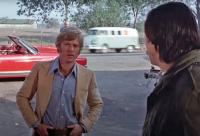
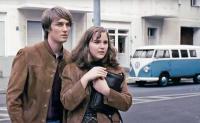
Posted: Fri May 10, 2024 9:27 pm
Size: 1300x886 Views: 8
Rating: Not rated
Type 2 in movies and TV- Batch 25 Rome
1. Green Standard Splittie in background behind main character (Robert Redford), movie "The Candidate" (1972).
2. Ivory Bay window Westfalia camper, movie "Melvin and Howard" (1980).
3. Composite photo of ivory Bay window camper in background, movie "Good guys wear black" (1978). In this fight scene with main character (Chuck Norris, in center in bottom shot) the camper changes position from front to rear...
4. Light grey early Bay window with red bumper parked in background, per #3.
5. Light blue Deluxe Bay Window parked, per #3.
6. Blue Bay window driving in background, TV show "Adam-12". Show episode and year not recorded. Main characters Ofcrs Pete Malloy (driving) and Jim Reed (Martin Milner, Kent McCord).
7. Blue standard Splittie parked in background, German movie "The Baader Meinhof complex" (2008) filmed in Germany.
8. Olive green '73 or later Bay window bus in a Fresno, California junkyard, movie "Hotrod horror" (2008).
9. Green late Bay window deluxe bus parked in background, TV show "The streets of San Francisco" episode "Interlude".
10. Ivory '71 or '72 Bay window camper in background, TC show "The streets of San Francisco" episode "The glass dart board".
11. Composite shot of red Deluxe splittie bus in background, YouTube video "Speed Odyssey Can-Am" (2008). Documentary of the Canadian-American Challenge Cup race car series from 1966 thru 1974. This race was at the 1967 race at the Mosport circuit northeast of Toronto, Ontario, Canada. The upper shot has the Roger Penske Racing's Lola T70 driven by Mark Donohue; lower shot is John Surtees's John Surtees Racing Lola T70. Full-length roof rack is a viewing platform for the bus' video film crew.
12. Beige early Bay window behind pretty spectator woman, per #11 at the 1972 race at Road America, Georgia. View other images: From Rome Search Forums for photo
Posted: Fri May 10, 2024 9:27 pm
Size: 1300x802 Views: 6
Rating: Not rated
Type 2 in movies and TV- Batch 25 Rome
1. Green Deluxe Splittie in background behind main character (Robert Redford), movie "The Candidate" (1972).
2. Ivory Bay window Westfalia camper, movie "Melvin and Howard" (1980).
3. Composite photo of ivory Bay window camper in background, movie "Good guys wear black" (1978). In this fight scene with main character (Chuck Norris, in center in bottom shot) the camper changes position from front to rear...
4. Light grey early Bay window with red bumper parked in background, per #3.
5. Light blue Deluxe Bay Window parked, per #3.
6. Blue Bay window driving in background, TV show "Adam-12". Show episode and year not recorded. Main characters Ofcrs Pete Malloy (driving) and Jim Reed (Martin Milner, Kent McCord).
7. Blue standard Splittie parked in background, German movie "The Baader Meinhof complex" (2008) filmed in Germany.
8. Olive green '73 or later Bay window bus in a Fresno, California junkyard, movie "Hotrod horror" (2008).
9. Green late Bay window deluxe bus parked in background, TV show "The streets of San Francisco" episode "Interlude".
10. Ivory '71 or '72 Bay window camper in background, TC show "The streets of San Francisco" episode "The glass dart board".
11. Composite shot of red Deluxe splittie bus in background, YouTube video "Speed Odyssey Can-Am" (2008). Documentary of the Canadian-American Challenge Cup race car series from 1966 thru 1974. This race was at the 1967 race at the Mosport circuit northeast of Toronto, Ontario, Canada. The upper shot has the Roger Penske Racing's Lola T70 driven by Mark Donohue; lower shot is John Surtees's John Surtees Racing Lola T70. Full-length roof rack is a viewing platform for the bus' video film crew.
12. Beige early Bay window behind pretty spectator woman, per #11 at the 1972 race at Road America, Georgia. View other images: From Rome Search Forums for photo
All times are Mountain Standard Time/Pacific Daylight Savings Time Page 1 of 1037
You cannot upload new pics in this category You cannot rate pics in this category You cannot edit your pics and comments in this category You cannot delete your pics and comments in this category