| Author |
Message |
nlorntson
Crazy VW Lady

Joined: March 13, 2004
Posts: 3783
Location: Twin Cities, MN

|
 Posted: Sun Jan 04, 2015 5:38 pm Post subject: Decklid repair Posted: Sun Jan 04, 2015 5:38 pm Post subject: Decklid repair |
 |
|
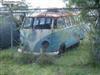
After taking a whack at repairing the gates on our 1963 double cab and seeing how they were assembled it seemed like an easy task to fix the decklid in a similar way.
We started with a stripped down decklid. A PO had acquired numerous dents and crushed areas around the lock and latch areas. As was done on the rest of the truck, 1/4" holes were drilled and copious amounts of bondo were added and shaped into a remarkably undamaged looking surface.
We've had to remove pounds of this artistry as we have worked to get the truck back to all good metal.
Here is the decklid after sanding off most of the bondo. All the dents and creases are a little hard to see but they are there. One hinge had also been replaced with a small piano hinge and four sheet metal screws into the top of the decklid.
Much of the damage was to the outside but the bottom of the inner reinforcement had been nearly flattened in some places and not "repaired" (covered in bondo) so we had issues on both the inside and outside just like the gates.
There was also a hint of rust all the way around the inner reinforcement seam where it was attached to the decklid and on the gates this meant pretty bad rust inside the reinforcement where no paint had ever been.
The picture I took of the decklid before it was dissected was too blurry to show, but here is how we separated the inner reinforcement from the outer panel. All the way around the outer edge is a folded over lip of the outer panel onto the inner panel. It turns out this was not spot welded like the gates so just peeling it back on three sides was sufficient.
The inside edge of the inner reinforcement was spot welded about every 4 inches all the way around. A sharp scraper blade on a putty knife was easily able to pop the welds loose. You can see some of the welds here.
Here are the two pieces separated. You can see the rust where the two pieces were together. There is no evidence of primer or paint on those inner surfaces so it's no wonder they rust out from the inside.
Sorry for the fuzzy picture here
Here you can see some more of the tiny spot welds that held the inner edge of the inner structure.
There was a tiny amount of over spray that went through the holes in the reinforcement.
With the two separated we'll be able to media blast all the rust from both surfaces and repair the dents and bondo holes. We also reinforced the hinge bolt plates and ran a thread chaser through the threads so were ensured of a fully functional hinge mount.
We painted the inside with some weldable primer. Here you can see some of the damage at the top and some of the extra holes in the hinge area at the bottom.
When it was time to reassemble, the outer edge was carefully crimped back around the inner reinforcement.
The edge looks great!
For the inner structure, we'll hold the inner structure in place and make a small tack weld each place there was previously a spot weld.
Once the welding is completed, We'll use some of the Eastwood internal frame coating to get a better seal on the inner metal. It's messy stuff but if you tape off ever seam, you can squirt some in and roll the piece around to coat everything.
Good luck with your gate repair! |
|
| Back to top |
|
 |
earlywesty
Samba Member

Joined: May 03, 2004
Posts: 2358
Location: In the woods, Ontario
|
| Posted: Sun Jan 04, 2015 5:49 pm Post subject: |
|
|
This is good stuff, thanks for posting. This and your gate thread would make great stickys for this type of work if Everett is listening.
I have an og paint decklid I'd like to try some of these repairs on. I am only concerned with burning through the exterior paint when reattaching the inner structure.
Great work. |
|
| Back to top |
|
|
cru62
Samba Member

Joined: December 31, 2002
Posts: 4117
Location: Margaritaville.....24/7
|
| Posted: Sun Jan 04, 2015 7:44 pm Post subject: |
|
|
| buseric wrote: |
.I have an og paint decklid I'd like to try some of these repairs on. I am only concerned with burning through the exterior paint when reattaching the inner structure
. |
I did much the same work to a '58 decklid. But, instead of bending three lips up, it can be accomplished by only bending one side over, breaking the lip loose on the other three sides to free the outer skin and slipping the inner frame out. I broke the spot welds with a small sharp chisel.
I'm not sure you could save OG paint, but at least it wouldn't be as damaging to it this way.
Also, you could use panel adhesive to glue the metal together instead of welding.
_________________
"My biggest worry is that when I die, my wife will sell all my parts for what I told her I paid for them"-Jon
Jokes about German sausage are the wurst.
Stop dead photo links! Post your photos to The Samba Gallery! |
|
| Back to top |
|
|
Stocknazi
Samba Member
Joined: June 18, 2004
Posts: 5150
|
| Posted: Mon Jan 05, 2015 7:26 am Post subject: |
|
|
| buseric wrote: |
This is good stuff, thanks for posting. This and your gate thread would make great stickys for this type of work if Everett is listening.
I have an og paint decklid I'd like to try some of these repairs on. I am only concerned with burning through the exterior paint when reattaching the inner structure.
Great work. |
It may minimize the burning of the paint if you placed a wet rag on the face side of the decklid while you made your tacks.
_________________
WANTED:
58 Westfalia cabinet knobs (3 needed), roof rack, and (7) privy tent poles (silver painted).
"When the people are afraid of the government, that's tyranny. But when the government is afraid of the people, that's liberty."
"Resistance to tyrants is obedience to God."
Thomas Jefferson |
|
| Back to top |
|
|
earlywesty
Samba Member
Joined: May 03, 2004
Posts: 2358
Location: In the woods, Ontario
|
| Posted: Mon Jan 05, 2015 8:03 pm Post subject: |
|
|
| StockNazi wrote: |
| buseric wrote: |
This is good stuff, thanks for posting. This and your gate thread would make great stickys for this type of work if Everett is listening.
I have an og paint decklid I'd like to try some of these repairs on. I am only concerned with burning through the exterior paint when reattaching the inner structure.
Great work. |
It may minimize the burning of the paint if you placed a wet rag on the face side of the decklid while you made your tacks. |
Thanks, I had thought about that idea and someone else also suggested compressed air on the back side as an option. |
|
| Back to top |
|
|
Stocknazi
Samba Member
Joined: June 18, 2004
Posts: 5150
|
| Posted: Mon Jan 05, 2015 8:14 pm Post subject: |
|
|
| buseric wrote: |
| StockNazi wrote: |
| buseric wrote: |
This is good stuff, thanks for posting. This and your gate thread would make great stickys for this type of work if Everett is listening.
I have an og paint decklid I'd like to try some of these repairs on. I am only concerned with burning through the exterior paint when reattaching the inner structure.
Great work. |
It may minimize the burning of the paint if you placed a wet rag on the face side of the decklid while you made your tacks. |
Thanks, I had thought about that idea and someone else also suggested compressed air on the back side as an option. |
I would use compressed air directly on the weld as well.
I always grab the air hose and have it ready when welding any sheet metal.
Great thread btw; I have been curious if the decklid skin was spotwelded to the inner structure.
_________________
WANTED:
58 Westfalia cabinet knobs (3 needed), roof rack, and (7) privy tent poles (silver painted).
"When the people are afraid of the government, that's tyranny. But when the government is afraid of the people, that's liberty."
"Resistance to tyrants is obedience to God."
Thomas Jefferson |
|
| Back to top |
|
|
Brian Anthony
Samba Member

Joined: October 02, 2006
Posts: 215
Location: Longview TX
|
| Posted: Mon Jan 05, 2015 8:37 pm Post subject: |
|
|
I use play dough to back up thin sheet metal when welding. It's pores so as any water in it vaporizes, it vents off. It also stays in place while welding.
_________________
1965 Double Cab
1967 Bug, Sedan
1967 Bug, Convertible
Im not old, but I once knew a man who was alive during the Civil War, and he once knew Revolutionary War veterans. |
|
| Back to top |
|
|
58Sleeper
Samba Member
Joined: November 16, 2012
Posts: 166
|
|
| Back to top |
|
|
Who.Me? 
Samba Member
Joined: July 14, 2014
Posts: 2211
Location: UK (South)
|
| Posted: Thu Jan 08, 2015 5:31 am Post subject: |
|
|
Spin off question from this - should the deck lid profile be dead straight or does it have any curvature to it?
i.e. If you placed a straight edge horizontally and vertically on the face of the deck lid, along the top, bottom and side edges, would the deck lid be flat or bowed?
Mine has what appears to be low-speed impact damage that has pushed the centre of the panel in, below the lock.
I'm considering trying a trick that's worked for me before, where I warm the panel and sandwich the bent edge between two 'formers' and clamp the sandwich together.
I need to know whether the profile needs to be straight or whether there is a contour to the panel that I need to shape the formers to follow.
I don't have access to an undamaged panel to compare it with, hence the question and the valance panel is similarly bent, so will need straightening too.
I suspect that it's low speed damage as there is no damage to the paintwork whatsoever, so it looks like it was pressed out of shape, rather than smashed out of shape. In the past, I've managed to reverse that type of damage by pressing it back out.
Thanks
Andy |
|
| Back to top |
|
|
nlorntson
Crazy VW Lady
Joined: March 13, 2004
Posts: 3783
Location: Twin Cities, MN
|
| Posted: Thu Jan 08, 2015 7:04 am Post subject: |
|
|
| This one we repaired has a curve top to bottom, in towards the apron. |
|
| Back to top |
|
|
58Sleeper
Samba Member
Joined: November 16, 2012
Posts: 166
|
| Posted: Thu Jan 08, 2015 8:33 am Post subject: |
|
|
| oh yeah.. It has a curve.. I was going to try to rebuild a new skin, but i realized there is a complex tapered curve. This is why I am trying to straighten out the original. |
|
| Back to top |
|
|
nlorntson
Crazy VW Lady
Joined: March 13, 2004
Posts: 3783
Location: Twin Cities, MN
|
| Posted: Thu Jan 08, 2015 9:34 pm Post subject: |
|
|
| nlorntson wrote: |
| This one we repaired has a curve top to bottom, in towards the apron. |
|
|
| Back to top |
|
|
Who.Me?
Samba Member
Joined: July 14, 2014
Posts: 2211
Location: UK (South)
|
| Posted: Fri Jan 09, 2015 1:08 am Post subject: |
|
|
Thank you.
With hindsight it makes sense that there would be a curve from
top to bottom to follow the profile of the edge of the adjacent rear corner panel.
Is there any curvature across the panel (horizontally)?
Thanks again
Andy |
|
| Back to top |
|
|
Stocknazi
Samba Member
Joined: June 18, 2004
Posts: 5150
|
| Posted: Wed Mar 25, 2015 8:45 pm Post subject: |
|
|
Anyone know what size diameter the decklid hinge pins are?
_________________
WANTED:
58 Westfalia cabinet knobs (3 needed), roof rack, and (7) privy tent poles (silver painted).
"When the people are afraid of the government, that's tyranny. But when the government is afraid of the people, that's liberty."
"Resistance to tyrants is obedience to God."
Thomas Jefferson |
|
| Back to top |
|
|
mastorna
Samba Member

Joined: May 26, 2008
Posts: 177
Location: Seattle
|
| Posted: Fri Jul 29, 2016 5:35 pm Post subject: Re: Decklid repair |
|
|
Oh boy. Do I have a doozy of a hack here.
http://c2.staticflickr.com/9/8719/28558144961_ac6817ece0_b.jpg
Oddly, I think have the original plate\screws from which the hinge was suppose to be screwed into as you can see in that last photo.
So this is clearly a total mess. any advance on how I should tackle properly correcting this? I fear that I have two problems:
1) I think the hinge itself was bent. I have other decklid hinges and clearly this is much less curved so it might not sit well if the decklid was attached again.
2) the decklid itself. I think decklids have the screw plate welded in at an angle to align with the angle that we'd expect on the hinge. I'm super doubtful as to how to get the angles right on the weld so everything works properly. Any advice there? Should I consider opening up the decklid to do the repair properly or do you think i could lay down some fat welds to fill this gap?
_________________
1959 Type II Mango SO-23
1962 Type II Kombi Light Gray
1963 Type II Standard Sunroof SWR\BG
1963 Type II Deluxe MG\PW |
|
| Back to top |
|
|
easy e
Samba Member

Joined: May 28, 2008
Posts: 3931
Location: 1 hr north of Santa Barbara
|
|
| Back to top |
|
|
Who.Me?
Samba Member
Joined: July 14, 2014
Posts: 2211
Location: UK (South)
|
| Posted: Sat Jul 30, 2016 2:46 am Post subject: |
|
|
| easy e wrote: |
| Who.Me? wrote: |
Is there any curvature across the panel (horizontally)?
|
No...straight across...like the hatch, decklid hinge carrier and rear apron. |
Thanks easy. I went ahead and had a go at roughly straightening it a couple of months back when I managed to source a good used valance. I used some clamps and 4 x 2 timber to get it close enough for now without unbolting it...
Before and after. You can see better how bad it was from the gap between the valance and bumper in the first picture...
...and later with a pair of Doug's repro bubble tail lights...
I also pushed out a slight bow in the left hand rear corner. The missing filler is where a PO tacked some thin metal behind the hacked-out taillight holes and just filled it to get it up to the same level as the corners. The hit that bent the taillight cracked it and it just fell out when I pushed the dent out.
_________________
Andy
Looking for info on my truck's history. Are you from Campbell California or nearby. Do you recognise it? ... http://www.thesamba.com/vw/forum/viewtopic.php?t=636786 |
|
| Back to top |
|
|
Stocknazi
Samba Member
Joined: June 18, 2004
Posts: 5150
|
| Posted: Mon Jan 01, 2018 6:09 pm Post subject: |
|
|
| cru62 wrote: |
I did much the same work to a '58 decklid. But, instead of bending three lips up, it can be accomplished by only bending one side over, breaking the lip loose on the other three sides to free the outer skin and slipping the inner frame out. I broke the spot welds with a small sharp chisel. |
Curious which side you peeled up to separate the front/rear pieces?
_________________
WANTED:
58 Westfalia cabinet knobs (3 needed), roof rack, and (7) privy tent poles (silver painted).
"When the people are afraid of the government, that's tyranny. But when the government is afraid of the people, that's liberty."
"Resistance to tyrants is obedience to God."
Thomas Jefferson |
|
| Back to top |
|
|
Stocknazi
Samba Member
Joined: June 18, 2004
Posts: 5150
|
| Posted: Tue Jan 09, 2018 7:14 pm Post subject: Re: Decklid repair |
|
|
I had a tough time bending the lip up, but finally managed to separate the 2 pieces.
What did you use to bend the lip up?
_________________
WANTED:
58 Westfalia cabinet knobs (3 needed), roof rack, and (7) privy tent poles (silver painted).
"When the people are afraid of the government, that's tyranny. But when the government is afraid of the people, that's liberty."
"Resistance to tyrants is obedience to God."
Thomas Jefferson |
|
| Back to top |
|
|
cru62
Samba Member
Joined: December 31, 2002
Posts: 4117
Location: Margaritaville.....24/7
|
| Posted: Tue Jan 09, 2018 10:19 pm Post subject: Re: Decklid repair |
|
|
The lip got opened up using nippers with a chunk of wood on the outside edge. The frame bent a little as the bottom was forced over the license plate bulge.
It was 20 years ago and we did it to use the original paint decklid skin since 58 decklids were somewhat hard to find . It was the inner frame that was the problem. How is it that they get so smashed up?
_________________
"My biggest worry is that when I die, my wife will sell all my parts for what I told her I paid for them"-Jon
Jokes about German sausage are the wurst.
Stop dead photo links! Post your photos to The Samba Gallery! |
|
| Back to top |
|
|
|


